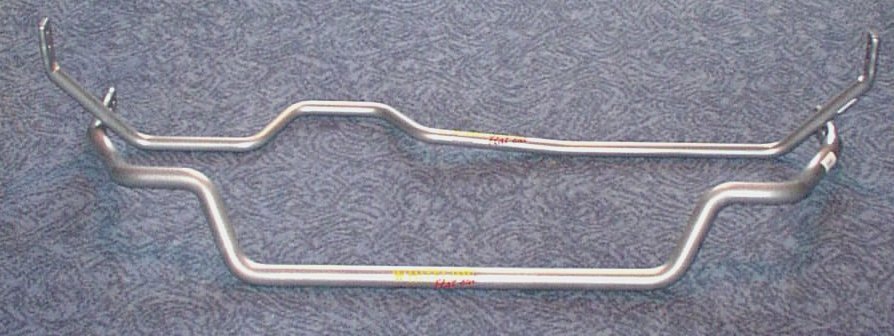
Fitting Whiteline Front & Rear Anti-roll Bars
Here's a simple guide to getting these fitted since Whiteline for some reason don't provide a fitting guide when they're delivered.
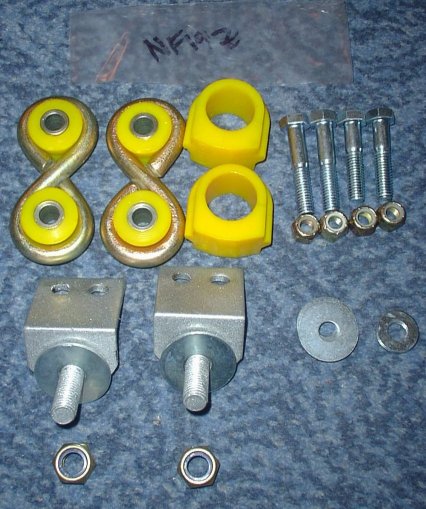
Here's the fitting kit you should get with the front roll bar:
and here's the fitting kit for the rear.
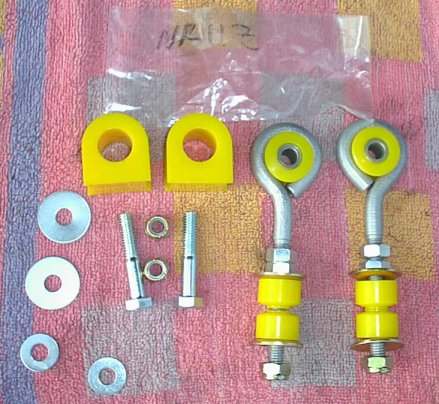
I found that there's not quite enough metal washers to do it properly so bought some extra 40mm ones with 3/8" hole.
Front Bar
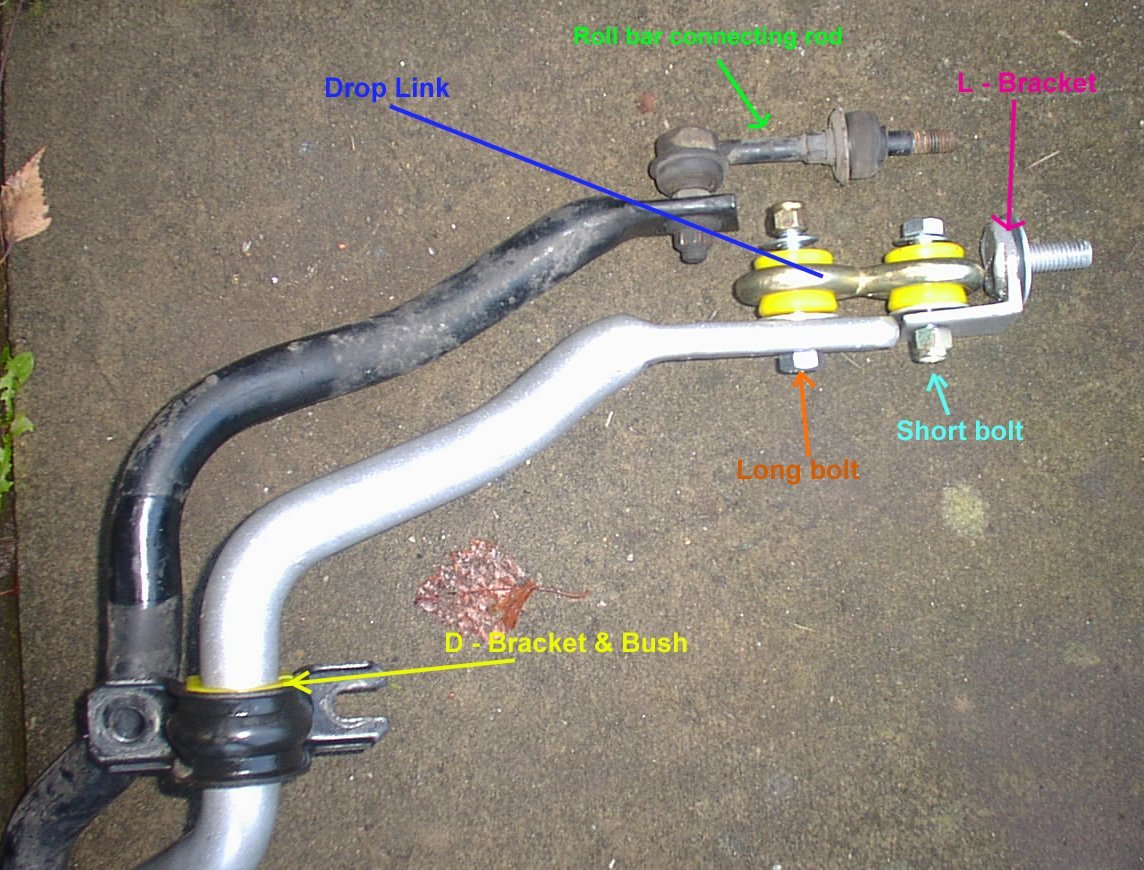
This is the more difficult of the two and most of my time was spent working out how it pieced together. I thought initially that I'd just be replacing the bar itself but you're also replacing the roll bar connecting rods too:
First, remove the plastic underguard and spray WD40 all over the nuts on the D-brackets and roll bar connecting rods and leave to penetrate. Then the bars need to be removed and installed whilst the suspension is under its normal compression (normal ride height), therefore just jacking it up isn't good enough. Ideally you need a pit or some ramps. Unfortunately you can't get ramps from the normal places that don't foul the S14s front spoiler. I personally faffed about jacking up one side and then the other and then back again and so on which wasn't ideal.
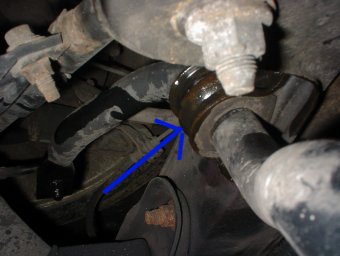
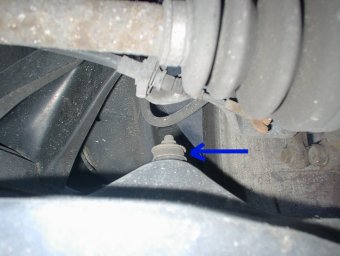
Anyhow, once you can get under the car, start unbolting the roll bar connecting rod from the tranverse link on both sides:
![]()
Then, unbolt the two D-brackets from the original roll bar retaining the brackets and the nuts and bolts. These are the only parts I reused:
Finally, remove the bar with the connecting rods attached.
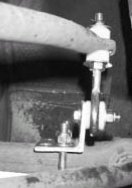
Next attach the drop links, washers, bolts and L-bracket to the Whiteline bar as in the picture above. Wherever any polyurethane bushes are touching metal, grease them up to prevent early deterioration. Don't tighten anything up yet and just leave it all a bit loose. I was confused again at this point because the L-bracket has two holes but the drop link only had one. Apparently this is just to provide a little bit of extra adjustment. Attach the D-brackets and polyurethane bushes in the same position as the originals on the new bar. Offer the roll bar up to the suspension member (the bit the D-brackets were bolted to) and loosely bolt the D-brackets to the member. Make sure it's central and the two drop links are positioned correctly with the L-bracket pointing :
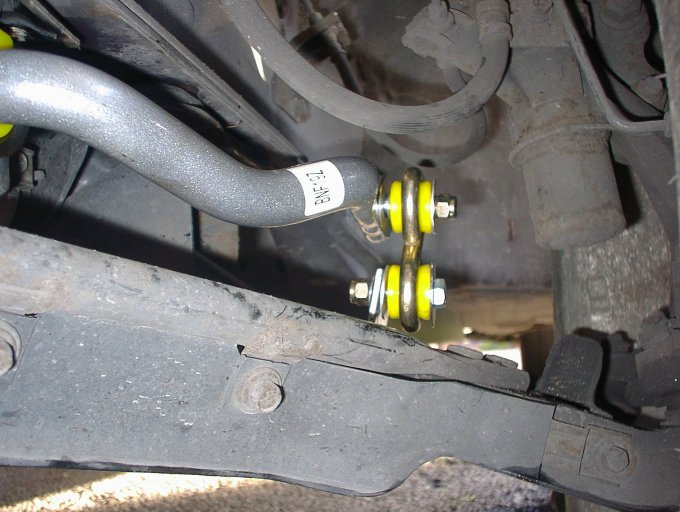
Bolt the D-brackets up tight (29-36 ftlbs), bolt the L-bracket down very tight. Don't use the original rubber bushes from the connecting rod here:
and then bolt up the nuts on the drop link nice and tight too. That should be it for the front. Just lower the car, go for a safe test drive and see how it feels. I'd recommend getting it up on the ramps again after a few miles just to make sure everything's still tight and how it should be.
Rear Bar
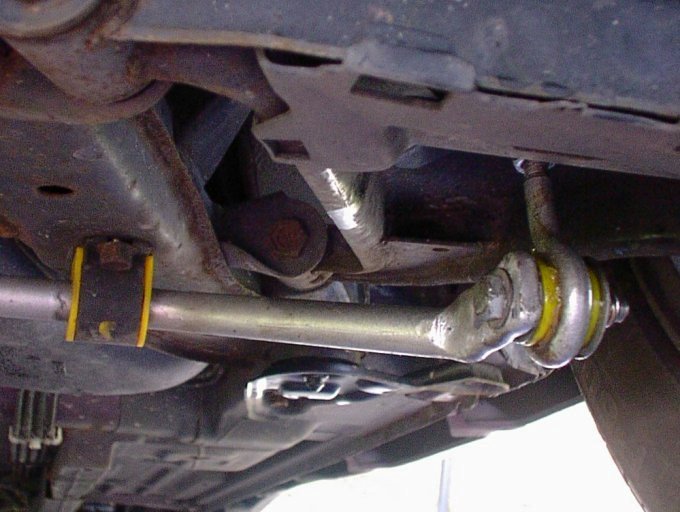
Reverse the car onto some ramps. Locate the anti-roll bar:
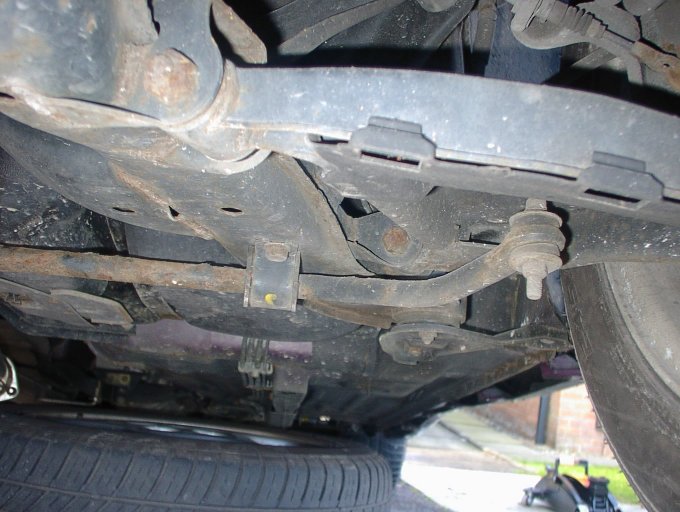
Spray WD40 over the D-bracket bolts and the connecting rods above and below the lower suspension arm (the bit the connecting rod bolts though) and leave to penetrate.
Unbolt the D-Brackets and then unbolt the connecting rods from the top of the lower arm:
and pull the bar out and off. You can do this with the exhaust in place (I've got a 3" Nur Spec R and managed to get it out after a bit of rotating).
Next assemble the new roll bar with it's supplied drop links/connecting rods and greased D-bracket bushes (this is very straightforward compared to the Front ARB) and spend about 15 minutes trying to get the bar through and around the exhaust. Make sure the ends of the roll bar are pointing towards the rear of the car.
Make sure it's aligned centrally and bolt up the D-brackets with the new bushes (greased) loosely. Feed the new drop links through the lower suspension arm making sure that there's a yellow polyurethane bush on either side of the hole you're feeding it through:
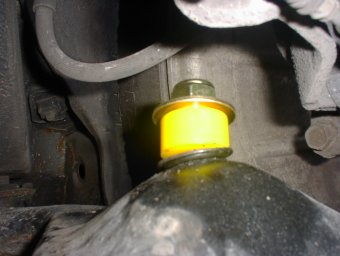
and bolt it up loosely. Once it's in position, do the D-brackets up tight (32-41 ftlbs), then the bolt going through the drop-link and finally the drop-link bolts - don't do these too tight, just make sure they're clmaped. If it all looks okay, unramp the car and test how it drives.
Again, as before, check the nuts & bolts after a few miles to make sure it's all still tight.
Oh, and don't forget to put the plastic underguard back on.
NJK 05/12/03 - Amended after some advice from Peter A @ Whiteline 16/12/03