Fitting An Uprated Wing Mount Intercooler
The standard cooler is okay for the standard car in the UK climate, but if your going to up your boost, your intake temps will increase too. So, you need a better intercooler.
The Front mount intercoolers are definitely the best at reducing these but they're expensive, require additional pipework & cutting, and sometimes even a battery relocation. A simple uprated wing mount unit does a really good job and can handle around 300bhp. Just enough for the moderate modder.
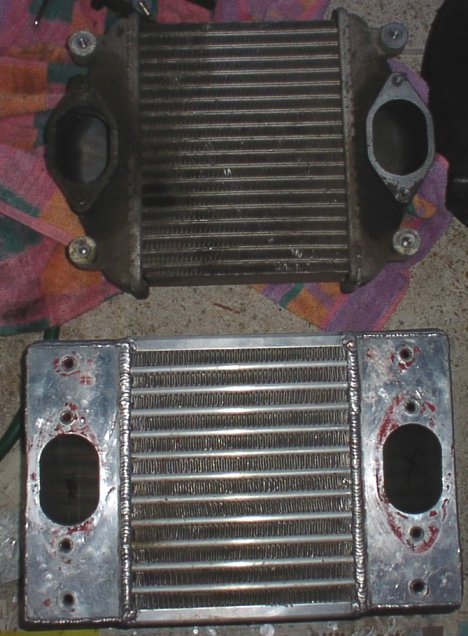
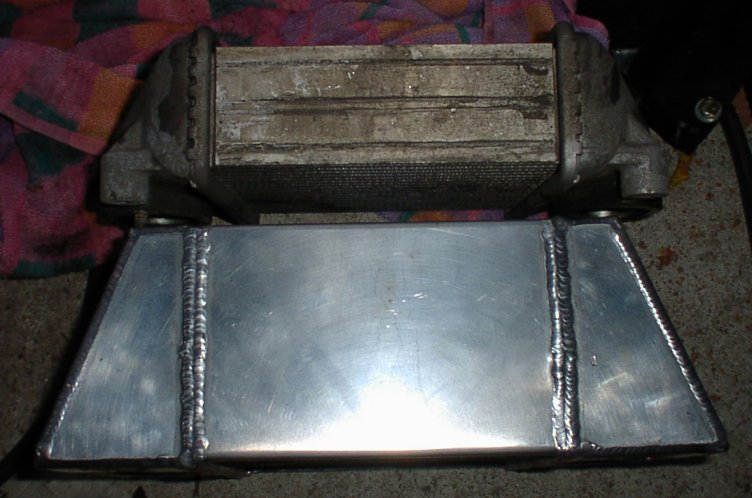
Here's the difference between the two. As you can see, there's a bit of a size difference:
Okay, on to business...
This should take about an hour to do from start to finish (unless it starts pissing down halfway through) and you may need a couple of intercooler gaskets (or some gasket glue instead).
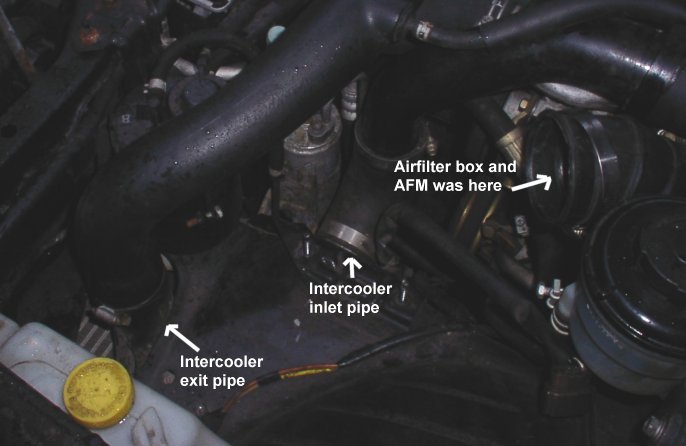
1. Remove the air filter box:
Unscrew and remove the airfeed pipe that leads into the airfilter box: There's just two bolts at the front of the intake.
Remove the two bolts near the wing on the airbox itself.
Loosen the jubilee clip behind the Air Flow Meter (AFM) and pull the pipe off.
Pull the AFM plug out
Undo the clips on the airbox and remove the top half including filter.
There will be two further screws inside the airfiler box that need removing.
You can now pull the bottom of the airbox away revealing the intercooler exit pipe.
Unscrew the jubilee clip on this and pull the black pipe away from the silver pipe.
2. Jack the car up and remove the near side front wheel:
There's a safe way to do this, make sure the handbrake's on, leave it in 1st gear, chock the unlifted wheels with some bricks/wood/proper chocks. Oh, and make sure your driveway's not on a 30° slope like mine.
3. Remove the black plastic shield from around the cooler:
This is retained by several plastic clips and 1 small screw. The plastic clips come out by prising the centre bit out with a flat headed screwdriver. Once removed, just pull the plastic guard away revealing your corroded 'cooler in all it's tiny glory.

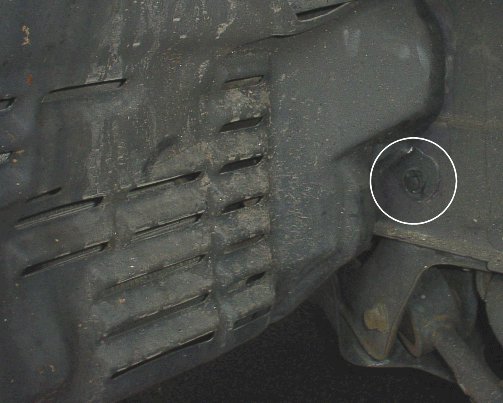
4. Take the japanese indicator blanking plate out by unscrewing the two small nuts inside the wing (3). This will let you get more light in and aid in removing yet more bolts.
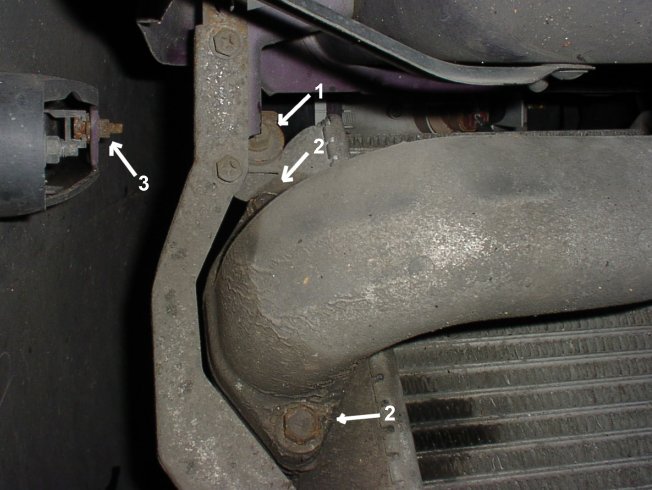
5. Take Intercooler off:
Okay, looking at the cooler with your head in the wheel arch, uncrew the two bolts (2) holding the intercooler exit pipe on (the pipe on the left). This will help give you access to everything else.
Unscrew the two bolts on intercooler intake pipe. The cooler will now be held in place by it's mounting points. Unscrew the 4 mounting bolts and catch the cooler before it hits the floor.
6. Fit the new Intercooler:
Just do the same as above in reverse order.
You might want to inspect your pipes and things while you have access to them for cracks etc. Make sure everything is done up tight because if there's leaks, the ECU will think more air is going into the engine than there really is and start overfuelling (more than usual).
That's it.
NJK 11/02