Upgrading the 200sx Fuel Pump
I'd been putting this off for about six months as I thought it was going to be a real tricky job. As it turns out, it was real easy and even though I was being very meticulous, I had it done in about an hour.
Run the tank to
as empty as you can get it. You don't want to start sticking your arms in a
tank full of petrol.
Undo the petrol filler cap to release some pressure.
Take out the fuel pump fuse (it's the 15amp one third down from the right in
the driver's footwell fuse box) then try and start the car for a few seconds.
This will release more remaining pressure from the fuel lines.
If you don't do this, you're going to get petrol squirting out all over you
and your car.
Finally, disconnect the negative terminal from the battery so that there's no
electricity running through the car at all which could cause a spark
As an extra (possibly unnecessary) precaution I also stood on the brake for
a couple of secs to discharge any further electricity stored up anywhere.
Make sure the doors to the car are open and the same with the boot. There's
going to be a lot of petrol vapour about which as well as being a fire hazard,
will also get you pretty smashed.
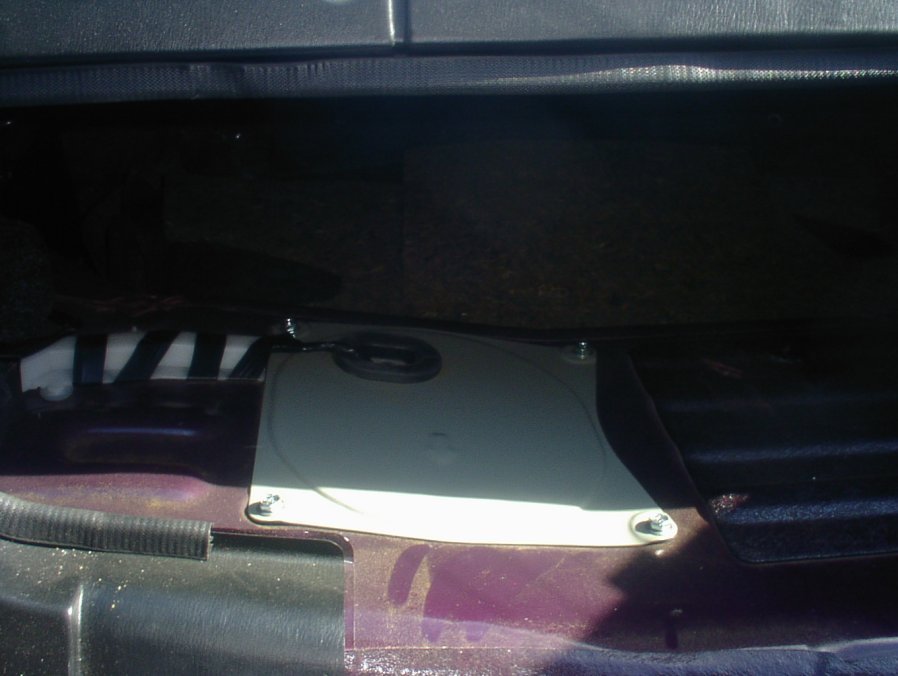
Right, pull down the rear seat and there's a grey cloth cover held in by two
black plastic clips. Pull the grey cover off to reveal the fuel tank cover plate:
unscrew the 4 bolt-head
screws and slide the plate away.
This'll reveal the fuel tank screw top lid with the fuel pipes coming through
the top.
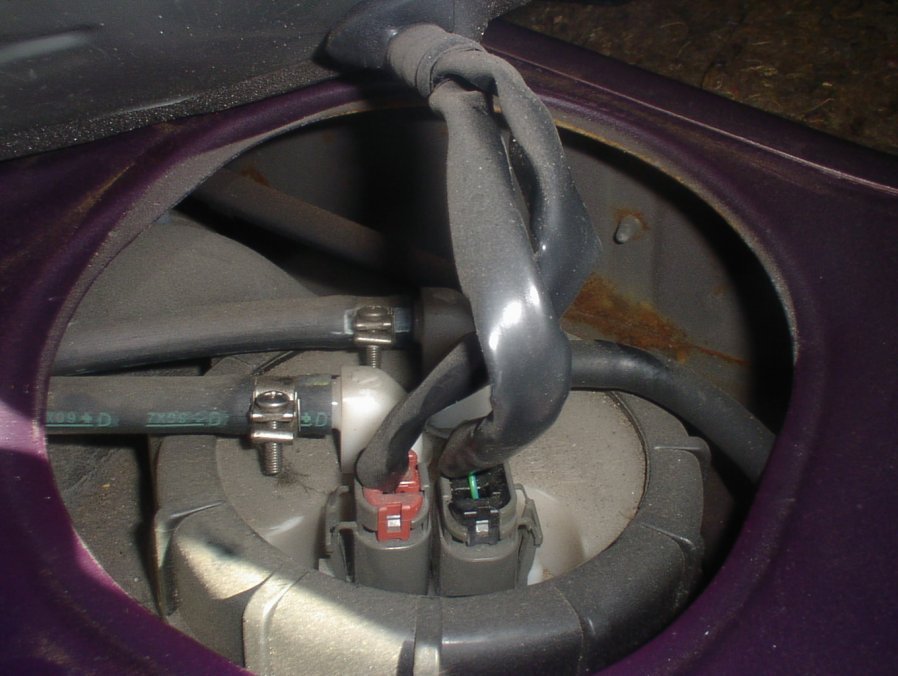
Unplug the two power connectors (don't worry about remembering which is which - one's a two pin and the other's a three pin so they can't be refitted incorrectly)
This leaves the three fuel lines to undo.
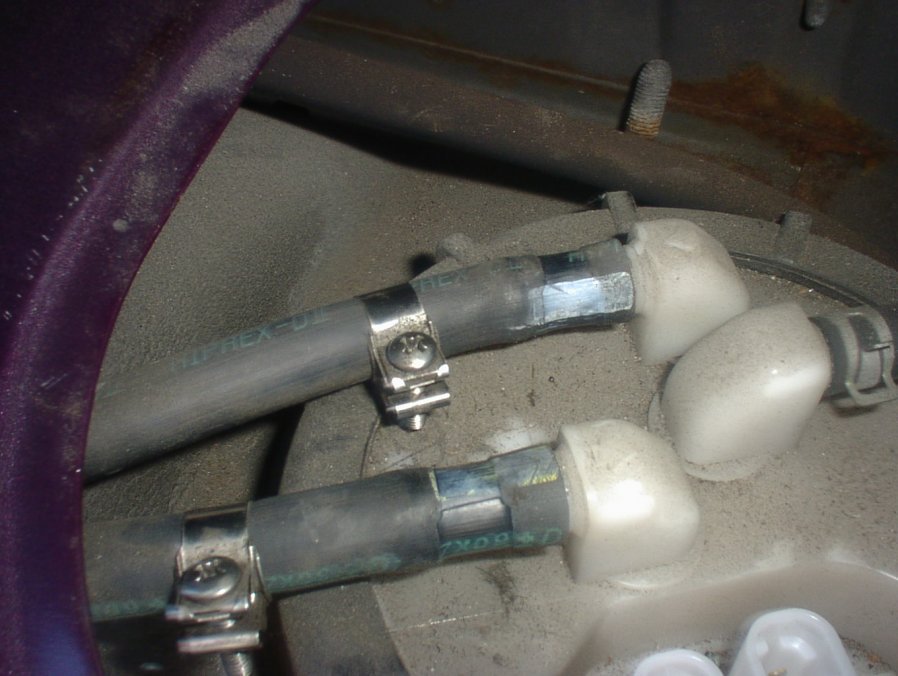
DO
make a note of which one is which for these.
Be careful when pulling the left-rear one out as mine still had a bit of pressure
in there which amounted to about a cupful of petrol.
Just use an old tea-towel or something to soak up the petrol which will leak
out.
Once the three pipes are out, you need to unscrew the black thing to take the
lid off. There is a special tool for this but if you can't undo it by hand
just get a blunt flat-headed screw driver and a mallet to one of the ridges
on it to undo.
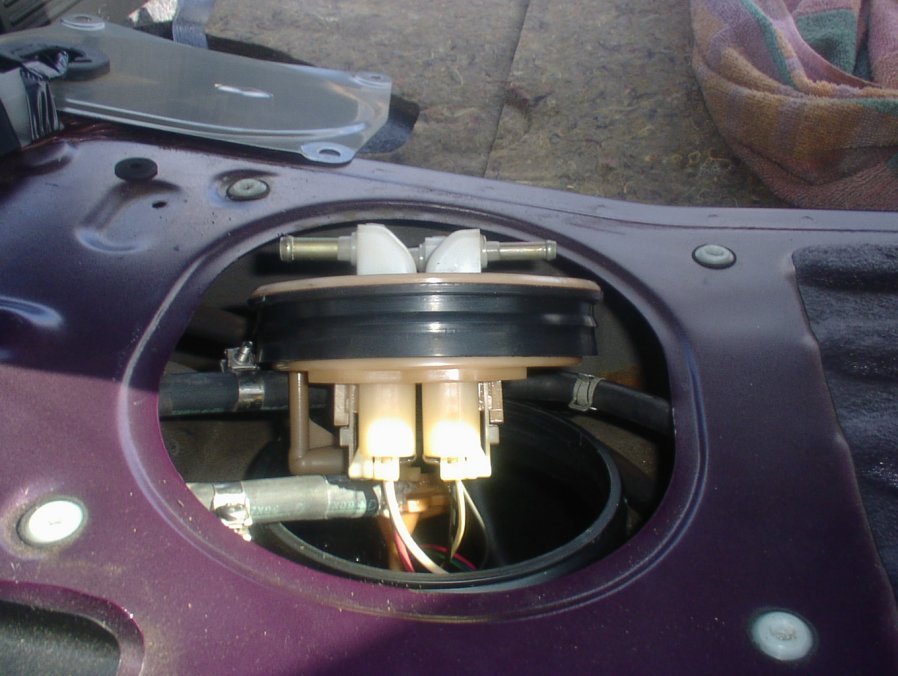
Once undone, pull
the white lid off and disconnect the two power connectors and the fuel line.
This will give access to the tank. If at this point you're on the back seat,
then the fuel pump is connected to a long holder attached to a bracket against
the fuel tank wall nearest to you.
It's a bit tight
but if you can look inside the tank, make a mental note of how the fuel-pump
holder is slid onto the bracket (I stuck my hand in there after I'd had a good
look and tried to lift the pump holder up a little to get a feel for how it
was placed)
I didn't want to take any pics inside the tank for fear of big flamage :) (the
camera was already wrapped up in clingfilm) but here's an image butchered from
the workshop manual:
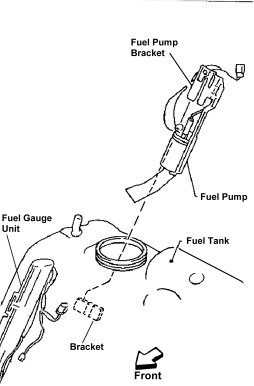
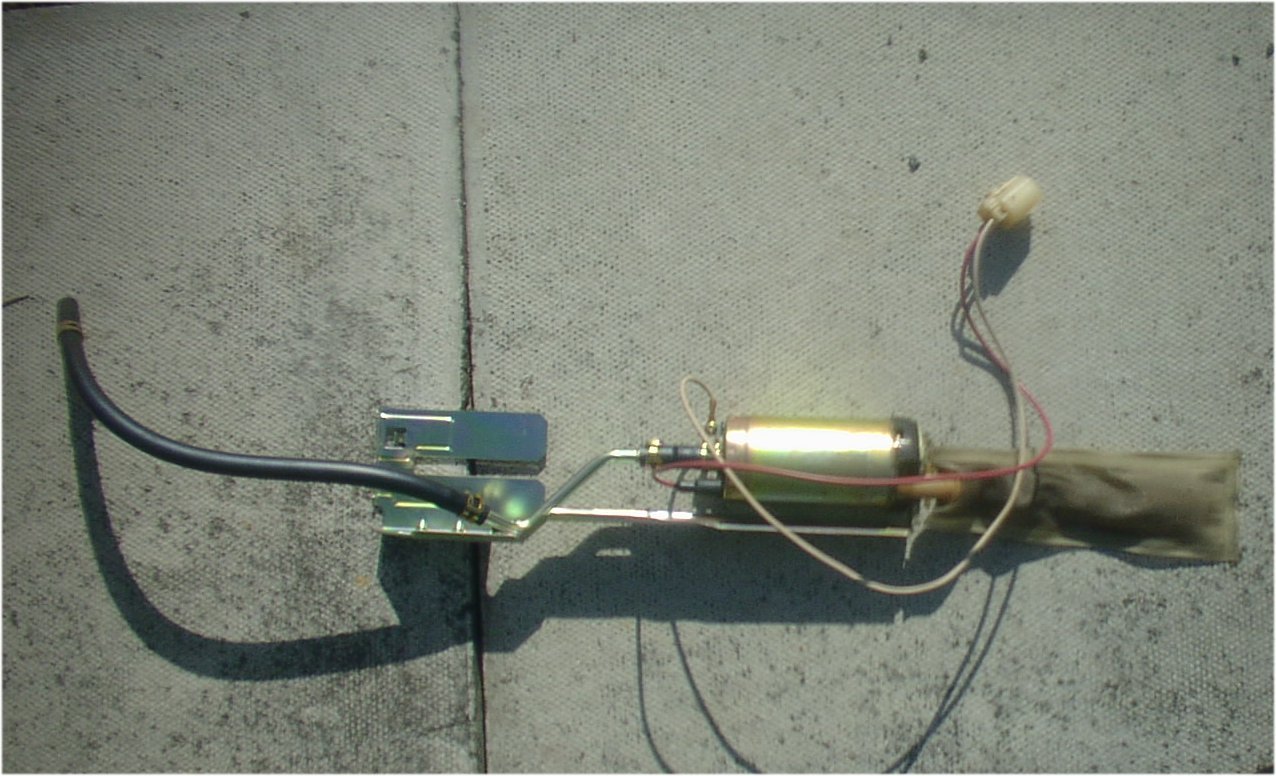
Carefully pull the fuel pump and holder out of the tank and you can see it looks like this:
Swapping the pump
over was a doddle.
Release the two clips from the fuel pipe at the top of the pump and slide the
pump out of the holding bracket and remove from the tubing.
Undo the sock from the pump (prise the circlip off) and unscrew the power wires from the original pump.
To put the new
pump in place, I emptied some petrol out of the body of the old pump into the
new one so that it wouldn't be running dry when first started up. I'm not sure
how necessary this is but it certainly can't do any harm.
I also reused the original sock because the one that came with the walbro was
pitifully sized and I wanted to make sure that the fuel was being picked up
from as low down in the tank as possible.
Once this is attached, I replaced the small piece of fuel hose on the bracket
with the one that came with the Walbro. I had to cut down the fuel hose a little
as it was about 2cm too long.
Put this hose onto the bracket, put the rubber base on the fuel pump and attach
the top of the new pump to the hose. You can then slide the new pump in place.
Make sure it's very snug at the bottom of the bracket. The small fuel hose was
done up tight using the two provided jubilee clips and the power connector was
then attached to the pump
It should now be looking similar to this:
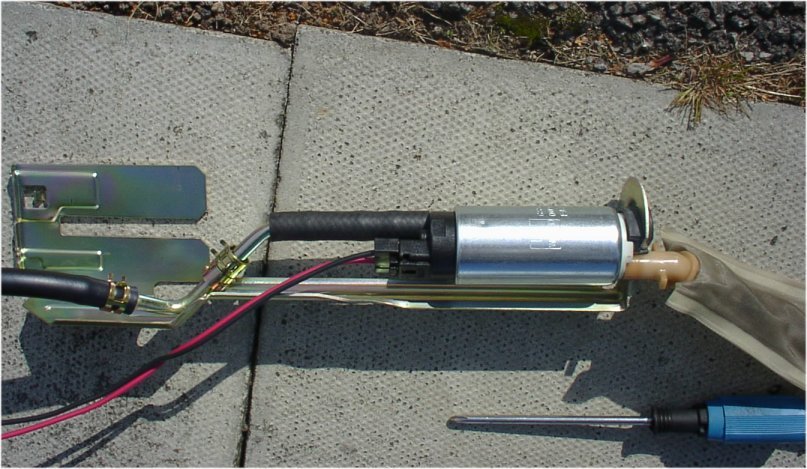
The next step is to attach the Walbro power wires to the original ones. Red +ve =>Red +ve and White -ve =>Black -ve
Chop the two circular connectors off the original wires and use a proper kind of connector such as soldering and heatshrink wrap or a crimp connector. I used some crimp connectors but make sure it's done up very tight so that there's no chance of it coming loose and creating a spark. Don't use electrical tape or such either as there's a good chance that this'll fall off exposing the bare metal.
We need to secure the pump to the holder to prevent it from coming loose but I was a bit concerned about vibrational noises and such. So, I used a piece of normal rubber fuel hose, cut into half lengthways, and wrapped this around the pump and holder and then used a cable-tie around this nice and tight.
Right, all you need to do now is to put it all back into the tank. Using your mental notes from before ;) slide it back onto the hanging bracket, plug everything back up in reverse order and there you go, installed.
Don't forget to put the pump fuse back in and reconnect the negative battery terminal.
Start the engine up and let it idle for a while to make sure everything's flowing nicely and then go out onto your private airfield rag the car to bits :)
NJK 30/09/03